Gathering Threads

Potpourri

Posted by on Nov 18 2014

No, I haven’t take up another craft. 🙂  It’s just been a bit hectic here and I haven’t made huge strides on any one project, so today’s post has a bit of this, a bit of that.

tangledstarsupdate (2)

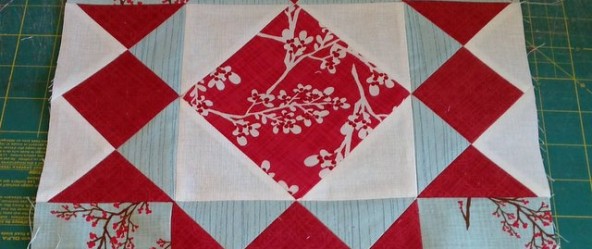
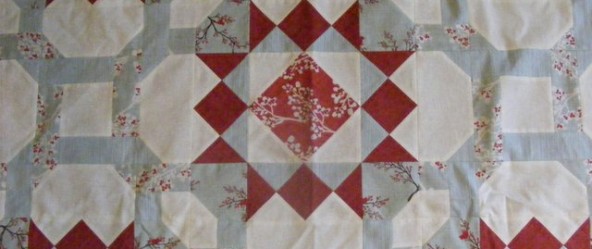
Making good progress on my winter themed quilt.   Here’s where I’ve got to with it.   Three more rows to sew together, plus the borders still remain.  You can really see the weaving effect once the alternate blocks are put side by each.

tangledstarsupdate (3)

I’ve finished all of the individual blocks and have started sewing them together.  If I had a diagonal bed, I could just call it a day, but I guess I’ve got to keep going and finish things up, eh?

I was also able to fix my backward blocks that I mentioned in my last post.  I had to rip right back to the centre square, press them and reassemble.  It wasn’t tons of fun but it wasn’t as onerous as I’d feared, either.

tangledstarsupdate (4)

But of course, I haven’t just been working on quilts.  Hallowe’en always looms large in my fall sewing plans.  The boys’ big night was successful (the ability to secure your body weight in sugar, chocolate and fat defined as ‘success’).  David, who’s coming to the end of his trick-or-treating career went as Hiccup from How to Train your Dragon.   I drew the line at making him a dragon, too.  He thought this was a perfectly reasonable request.  However, when I told him I’d do it, but I’d charge him 50% of his candy haul, he reconsidered.  Negotiating tactics are so critical in the pre-teen years 🙂  I made the pattern for the tunic and the leather jerkin, and cannibalized a thrift store leather purse for the hardware.

 halloween2014 (2)

And Andrew?  He went as a Gashlycrumb Tiny.

No?  Not ringing any bells?  Edward Gorey, 20th century American illustrator, is best known for his macabre ink drawings of vaguely Edwardian children, in an alphabet where everyone meets a terrible end.

A is for Amy who fell down the stairs.

B is for Basil assaulted by bears.

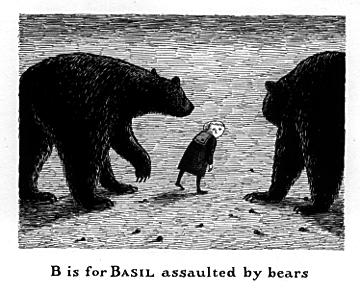
You can see the fate of all twenty-six ill-fated tots here.  My kid went as one of the soon-to-expire kids (he was torn between Hector, who’s done in by a thug, and Edward, who choked on a peach.  My fav is definitely Neville, who dies of ennui).  Completely obscure but he loved the suit and that’s what counts.   He had to wear rainboots while he trick-or-treated because of the weather but at school he’d just worn black shoes.

The funny part for me was the costume.  It really *is* a vintage design.

vintage boy's knickers and jacket pattern

I picked it up on ebay for $8 bucks, got some really cheap acrylic wool-look a like, and then banged out the suit (handwork on a Halloween costume!  Not in this lifetime).  Then we completed the look by pairing it with an old pair of soccer socks and a shirt and tie we already had on hand.

vintage pattern instructions (2)

There’s something very amusing to me as an heirloom sewer when this is what I end up putting my skills into.    He had a blast – the hardest part for him was to look suitably dour – he doesn’t do mournful very well.  Loud?  Excited?  Full of enthusiasm?  Yup, but not mournful.

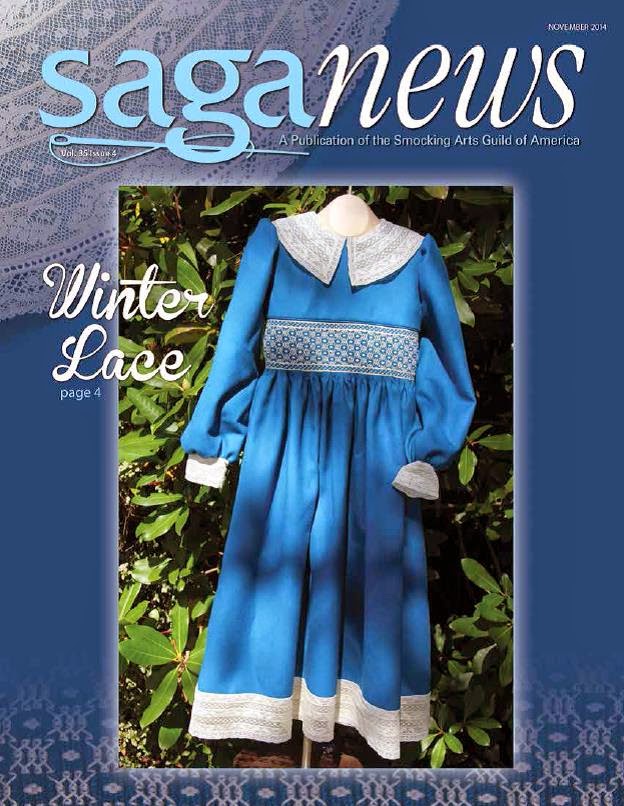
And finally, in a brief toot-my-own-horn moment, my teal and ecru wool dress is gracing the cover of the latest issue of SAGANews. SAGA members can expect to get their issues shortly – I understand from Julie that they were mailed out this week.


A Beginning on “Oh My Tangled Stars”

Posted by on Oct 14 2014

As the year begins to wind to a close, I am trying to keep my New Year’s Resolution on track: completing all of my UFOs (quilted, smocked and sewn) by Dec. 31.

Oh My Tangled Stars” is a quilt that I haven’t mentioned in ages, so it definitely qualifies for UFO status.

tangled stars quilt wip (1)

OMTS has been sitting in its rubbermaid box, without any progress for over a year, because I was stymied by the colours.  Here’s a small image of the completed quilt; the pattern is by Border Creek Station.

In order to make the woven blocks work properly, I needed a solid or lightly patterned blue fabric that would coordinate with the Moda Winter Berries fabric line I had chosen.  I should know better than to use one fabric line for this exact reason – if you try and colour outside the box, getting fabric to match is darn near impossible.   It’s a very pale blue-aqua.  It’s not baby blue, it’s not light teal.  It’s right in between and for the life of me, I couldn’t seem to find a match.  Online shopping is great for many things but getting the perfect match for something like this was not easy.  I ordered three different fabrics before I finally found the right one.  And now of course, the matching fabric has also been discontinued, so if I had needed any more, I wouldn’t have been able to get it, either.

tangled stars quilt wip (2)

Yesterday was Canadian Thanksgiving and happily, it rained all day, freeing me from any guilt I might have felt about working outside to clean up the garden or go for a hike with the boylets. I spent the morning working away in my sewing room, working on the red and white harlequin bands on this block.

Don’t be fooled by this pretty completed block – I’ve still got to finish sewing half a dozen side pieces to the red and white centres, and I have barely begun on the top and bottom bands.  I was just impatient to see what the finished block would look like, so I hurried this one along.  It is nice though, isn’t it?

This quilt has a very wintery theme to it, with the pale blues and cardinal reds. I’ve made a conscious effort to pay attention to detail on this quilt and I’ve worked really hard to match points and corners and keep everything as square and flat as possible.  I’ve even kept the directional fabrics consistent.

tangled stars quilt wip (3)

See how the lines on the inside blue triangles run up and down on the side blocks, and then continue in the same direction across the top.  All of the fabric is aligned like this and I really like how unified it looks.

But for every success, there is an equal and opposite failure.   Here is the centre of the woven block.  Looks good right?  Nice and flat, and the blue striped fabric is the correct orientation.  What on earth could be wrong with this block? Nothing, except that I assembled it backwards….

*facepalm*

tangled stars quilt wip (4)

I’ve got the blocks running clockwise around the white centre square.  Never even occurred to me to double check the pattern, I just sailed on in.  It was all fun and games until I started assembling the woven blocks and then the confusion started.  I tried tracing the woven pattern.  Over, over, under…no…try again….over….over…under….What the???

Here’s what it’s suppose to look like!  If only correcting a mistake like this was a simple as it is in photoshop.  Click ‘mirror image’ and you’re done.  Not only did I have to disassemble nine woven blocks, I’ve got to recut and resew the centres so they’re correctly oriented before I can reassemble them.  It’s not a fatal mistake but it still made me feel pretty foolish.

tangled stars quilt wip (5)

Boo-boos not withstanding, finding a few minutes escape in my sewing keeps me sane and gets me out of my head, which is a fairly crowded place to be at the moment.  I’ve got people like Emily Carr, Charlotte Bronte, Mary Wollstonecraft and Judith Butler all clamouring in there.   I’m not crazy (yet!) just busy preparing for my Comprehensive Area Exams, which are coming up in mid-December.  I’m on track to complete my reading list, because I was very diligent over the summer, but it’s still an intense couple of months until I write, because I’ve got about 30 texts still to tackle, and they’re all theory texts at this point (eco-feminism and indigenous subjectivity, anyone??).   I’m averaging between 800 and 1000 pages a week and between my PhD reading and teaching and family responsibilities, it’s a busy but exciting time.

I’ll be turning my attention to Halloween costumes next: Edward Gorey and Hiccup the Dragonrider will be sallying forth in search of candy all too soon!

Book Review: Simple Appeal by Kim Diehl

Posted by on Sep 26 2014

Ever since I tackled Spring Bouquet, I’ve been addicted to applique.  When I saw that Kim Diehl had a new book out, Simple Appeal and that it featured a number of quilts that combined piecing and applique, I was sold.   I liked the combination of traditional colours with a modern flair.

I was especially attracted to this quilt: Farm Girl Finery.  Name’s a bit silly but it’s very pretty.  And at 64″ x 64″, a nice size for a throw, with colours I already had to work with in my stash.

Like many (most?) of Kim’s other books, it’s published by Martingale.  Lovely photography, with clear pictures of the quilts in situ and flat, with lots of good detail shots.

The binding though, is a bit stiff.  I would have preferred a coil binding or a weblink that would allow me to download the applique shapes.  Tracing the shapes out of the book for a single quilt has already cracked the spine and loosened the pages.   Longevity wise, or if I was planning on making multiple quilts from this book (I may still, since I like “Sprigs and Twigs” and “Late Bloomers” but nothing is definite), I’d worry a fair bit about pages coming out and getting lost.

Since I’m still on my UFO kick, I was reluctant to start a new project (but I got over my reservations pretty quickly and started it anyway! :)).   Since I got this book in July, I’ve started on the applique blocks and piecing the inner block border for Farm Girl Finery.  Basting all the circles took a good couple of hours of TV.  I have also pieced the outer stars, but have yet to applique down the all concentric circles.

farmgirlfineryblock (4)

My biggest peeve with this book isn’t the accuracy of the instructions, or even the binding, so much as it is the inefficiency of the cutting and sewing directions.  Kim’s yardage requirements are off the wall.   I’m not a quilting expert, but even I know about HST and QST techniques, and how to make flying geese four at a time.  But this book doesn’t use any of those – Kim’s direction rely almost exclusively on the flip and stitch method.  That’s great if you’ve only got one square with triangles on the corner, or really irregular measurements but it’s wasteful used exclusively.  (I don’t even care about the marking – I mark my HST, too)  But when you do an entire quilt with flip and stitch, dozens and dozens of blocks, all the corners you trim off add up to an amazing amount of yardage that you just throw away.

farmgirlfineryblock (1)

Let me give you the math to show you what I mean.  Farm Girl Finery’s finished size is 64.5″ x 64.5″ or 4160 square inches.

As they are written, Kim’s directions for this quilt require 7 3/4″ yards of cream, red and brown fabric.   Assuming 42″ width per yard,  subtracting out the 1/2yd for the binding and not including all the fat quarters used in the border or the scraps you use for applique (which I’d estimate at another 1/2 yd total), that gives you a grand total of 10962 square inches (7 1/4 x 36 x 42).

4160 divided by 10962 = 0.379.  In other words, you’ve bought almost eight yards of fabric and less than 40% of it is going to end up in the actual quilt.  Yet with just a little math, using some more efficient piecing methods and bit of preplanning, I was able to cut Farm Girl Finery using only 5 yards of fabric (7560 sq”).  That means that 55% of the fabric I bought was used in the final quilt top instead of a measly 38% (an increase in efficiency of nearly 50%) and that I only spent $60 dollars on materials, assuming $12/yd, rather than $96 in materials.   That adds up and these kind of numbers effect the number of quilts I will ultimately make.

farmgirlfineryblock (2)

I don’t think these types of calculations should be left to the reader.  Some people won’t have the inclination or the skills to figure out the better way.  And, while yes, there will be left overs — scraps you can use for other projects — much of it will be too small to be useful and could have been avoided entirely by using more efficient cutting and piecing techniques.  I know this seems a bit nitpicky but waste bugs me.  I’ve sewn quilts by designers like Carrie Nelson, where almost every inch of fabric is used.  The cutting directions are meticulous, and yes, it does take a little more time to follow them, but I don’t waste fabric or money, both of which are important to me.

farmgirlfineryblock (3)

So overall, I’m going to give Simple Appeal a B grade.  It has a variety of projects in a range of sizes from decor accents to bed quilts, the designs are an appealing mix of traditional and contemporary styles that can be made in a wide variety of fabric types and eras and the project difficulty ranges from determined beginner to intermediate quilter.   On the downside, the cutting directions and fabric yardages are sloppy and inefficient, and the binding quality suggests that the book won’t stand up to heavy use.  (And like all my reviews, I wasn’t paid (ha! that’ll be the day!) or given a free copy of the book.  I bought it myself and my opinions are my own.)


A Quilt of Valour Donation

Posted by on Aug 03 2014

What do you do when you finish a UFO and it just doesn’t speak to you?

Shifting Gears quilt

That was the dilemma I was facing with this quilt, which I’d started with the intention of it being for Andrew.

His room is done in a deep red, with a black and orange flame border à la Hot Wheels.   He’d been making do with a boring, grey duvet since I’d painted his room so when I found a black flame fabric that was a dead ringer for his border at Joann’s in 2012, I decided it was time to make him a quilt, too.

Shifting Gears binding and backing

I started keeping an eye out for a good boy pattern and I thought I’d found it with a pattern called “Shifting Gears“.  Featured in the Spring 2012 issue of Quilts from Quiltmaker’s 100 Blocks magazine, the design was bright and modern and would give me lots of room to bring in the reds, oranges and yellows that Andrew so loves.

 Things went along swimmingly.  I got all the pieces cut out and then, as life has a tendency of doing, I got busy with other things and the blocks got shuffled off to the side, unassembled.  So this summer, as part of my (never-ending) UFO kick, I buckled down and got it put together.

I should have been ecstatic.  One more UFO crossed off the list.

And yet…

No matter what way I turned it, or draped it, I just didn’t *like* the finished product.

Shifting Gears quilt (2)

Individually, the colours are good.  But all together, the white backdrop is too different from the black flames and the reds and oranges are too bright to meld well with the deep red paint in Andrew’s room.   But before I decided irrevocably, I laid it out across Andrew’s bed and asked him what he thought.   Andrew looked at it long and hard and shrugged.  “It’s OK, Mom, but I think I like the duvet better.”  Seeing the look on my face and misinterpreting it as being brought about by his lack of enthusiasm, he hastened to reassure me.  “I mean, it’s not bad.  And you sewed the pieces together pretty straight.”

Shifting Gears close up

That was the final nail (or pin!) in the quilt top.  Now that I knew Andrew wasn’t going to be heartbroken if this long-promised UFO never made it to his bed, what was I going to do with it?  It wasn’t a binner – I had too much time invested and the quality of the materials were good.  Happily, a solution was close at hand.

Alison, my long-arm quilter, is among the other twenty-seven hats she wears, the coordinator for the local arm of the Quilts of Valour program.  It’s an charity initiative that gives quilts to members of the Canadian Forces, past and present, and their families, during times of need – often during medical treatment or illness.  Making a quilt top to donate had long been on my list of oughta-dos, but there were never enough hours in the day.  Now I had a great ‘guy’ quilt all ready to go.   I bundled everything up – pieced top, backing and binding – and dropped it off at Alison’s last week.

She’ll be taking it from there.  She’ll quilt the piece and finish it.  Then it will be collected and distributed to a serviceperson.  I hope they enjoy it and that it gets lots of use.   It makes me feel like I’ve contributed to something worthwhile, even if Andrew still has to make due with his boring duvet for a little bit longer.

An Enigma Solved – Embroidered Coat Finished

Posted by on Jul 14 2014

I’m so proud of this coat.  As my regular readers know, I’ve dubbed 2014 the “Year of the UFO” and this embroidered coat was the ufo-iest of all my ufo’s.

Enigma embroidered coat front view

No more.  My version of Enigma, the embroidered swing coat,  is all finished.  Every last bit from the bound button holes to the swing tacks that hold down the lining.

Enigma embroidered coat side view

I started this coat more than two and a half years ago and blogged about the embroidery in some detail.  I was inspired by a very early issue of Inspirations (#12).  Loved the coat to pieces but couldn’t see myself knitting the coat just to embroider it, too. Besides, it only came in a 6m size.

Instead, I used a dark navy wool coating and a Ottobre pattern from the Winter 2008 issue.  It worked a treat.  I zipped through the embroidery, got everything cut out, even got a start on the assembly and then…nuthin’.  I got busy doing other projects, I misplaced the pattern piece for the sleeve, which meant I couldn’t cut out the lining pieces and Ellie grew.

Enigma embroidered coat back view

 And every time I looked at the clear zippered bag that incomplete coat carcass or moved it to get at something else, I felt guilty.  But my guilt has lifted, because this wonderful little coat isn’t a UFO any longer.  Hoorah!

Let me walk you through some details.   Obviously, the star of this coat is the embroidered hem.  Here it is, all spread out. You can see the ‘swing’ design of the coat when it’s laid out flat.  The bottom hem measures almost 1 1/2yds wide, so it was a fair bit of embroidery.

Enigma embroidered coat full hem

The embroidery is worked with DMC floss in a variety of simple stitches – buttonhole, french knot, stem stitch, straight stitch and detached chain.  As I discussed in my first, long-ago post about this coat, I used water soluble stabilizer, basted to the wool, to transfer the design to the coat.  It worked really effectively, even if it was a bit unorthodox.

Here’s a gallery of close ups of the entire hem, so you can see the details (and occasionally the cat hair) in its entirety.

Construction itself was, once I got around to it, pretty straight forward.  I didn’t want to compete with the embroidery but at the same time I didn’t want it to feel bottom heavy.   So to lighten things up, I used a 1/4″ navy gingham check as my contrasting fabric.  All of the edges are bound with it, plus it’s also used for the lining itself.   This is both a design detail and a solution to the problem working with the very thick coating.  Things get bulky and awkward very quickly, and given the scale of the coat, which will be worn by a toddler, I didn’t want things too get too thick.

Here is how I handled the collar.  The upper collar is made of coating, with a light fusible interfacing applied to the wrong side.

Enigma collar detail

The under collar is simply gingham, and the edges are bound with bias that finishes to 3/8″ wide.   It’s clean and streamlined and I like how it looks when you pop the collar. 🙂

Enigma undercollar detail

 The patch pockets the centre front edges are bound in the same fashion but I handled the hem a little differently.  The lining and the coat hem hang separately on this coat.  I could have used a facing but again, bulk was an issue.  So I cut a 3″ wide piece of  gingham bias and stitched it to the bottom edge.  From the front, it looks just like the other edges.  Inside, you can see the difference.

Enigma coat hem

I folded it to the wrong side, stitched in the ditch to secure the bottom edge and then catch stitched the raw edge in place.  It’s completely invisible from the right side, since the coating is so thick and the hem of the lining hangs down and covers it.  It allows the layers to move independently of each other and adds zero bulk.

Enigma coat lining

The last detail on this coat are the buttonholes.  Instead of simply working a machine stitched buttonhole, I went with three bound buttonholes instead.  Again, it was a solution to the thickness of the coating that became a design element.

Enigma embroidered coat buttons

I was torn between doing navy buttonholes and gingham buttons or gingham buttonholes with navy buttons.  As you can see, I went with the latter and I think it was the right choice. Bound buttonholes aren’t hard, really, just fiddly and while mine aren’t absolutely perfect, they came out very consistently, which I think is almost more important.

Enigma bound buttonhole cu

So there you have it, a major UFO crossed off the list.  Of course, it’ll be a couple more years before Celeste is big enough to wear this coat but in the meantime, just knowing it’s ready for her to wear feels fantastic!