My Quilts at the Quilts in Bloom Show
Posted by Claire on Jun 03 2016
I had a lovely day with my mom, visiting the Hamilton Quilter’s Guild annual show, Quilts in Bloom, today. I had two quilts in the show (Spring Bouquet and Oh, My Tangled Stars). Both were quilted by Alison MacDonald, my long armer extraordinaire. She’s a member of the guild, so she was able to enter my quilts into the show.
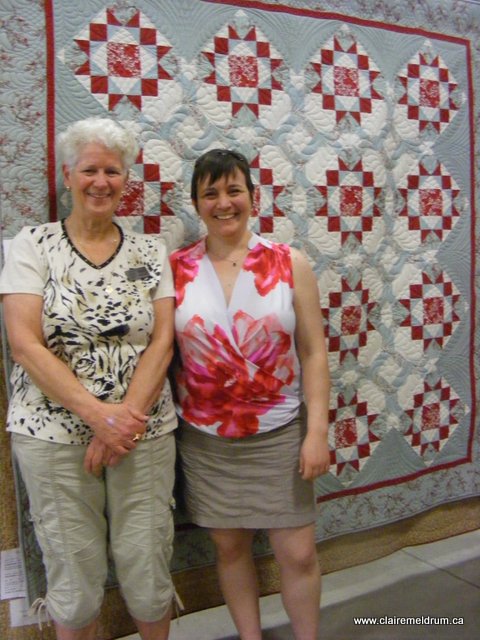
Alison and I, causing trouble
It was really nice getting to see all the quilts, which ranged from huge king size quilts to itty-bitty art pieces to everything in between. The event took place at the Ancaster Fair Grounds and it was wonderfully laid out, in the main fairground building, with wide aisles and easy access. Getting around was a breeze. The organizers did a wonderful job!
Me, myself and I
I received many compliments on both of my quilts (and if there were any comments that weren’t kind, I didn’t hear them :)) and enjoyed striking up conversations with the show’s visitors, as we all circulated and admired the many spectacular quilts, and swapped tips and techniques. It was also interesting seeing the same pattern interpreted by different quilters – it really is amazing how different a design can look in another colour way.
Here are some shots of my quilts on display.
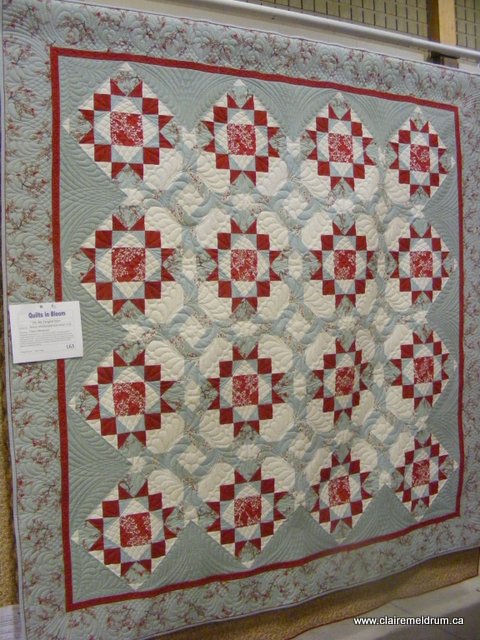
“Oh, My Tangled Stars” Pieced Claire Meldrum, Quilted by Alison MacDonald
Look at Alison’s stupendous quilting! The feathers, the curved cross hatching, everything. There are two layers of batting in this (an 80/20 cotton plus a wool batt). This gives it tremendous loft and an almost bas relief quality.

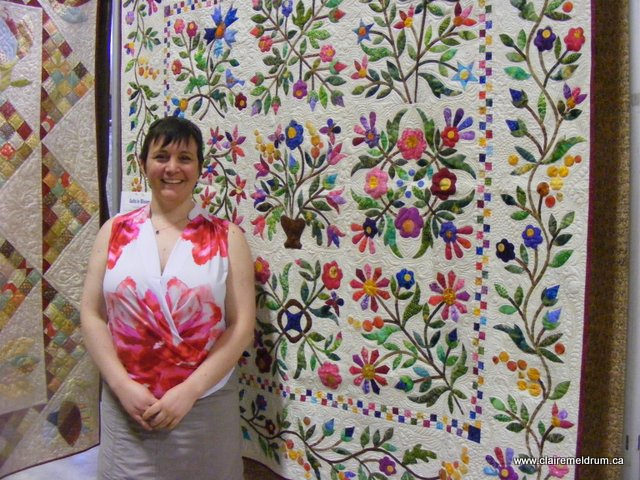
And Spring Bouquet.
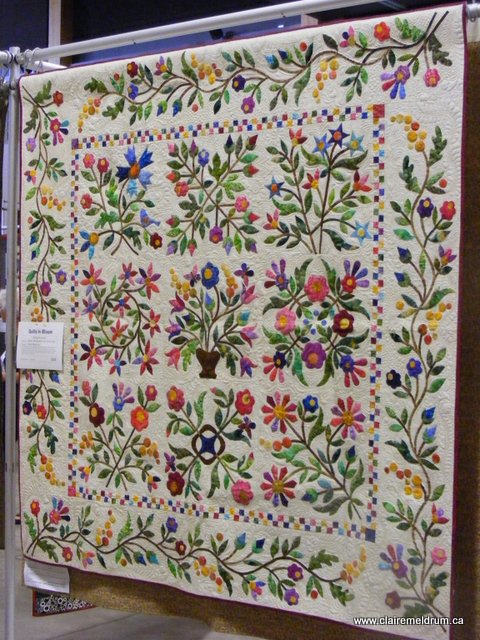
“Spring Bouquet” Appliqued by Claire Meldrum, Quilted by Alison MacDonald
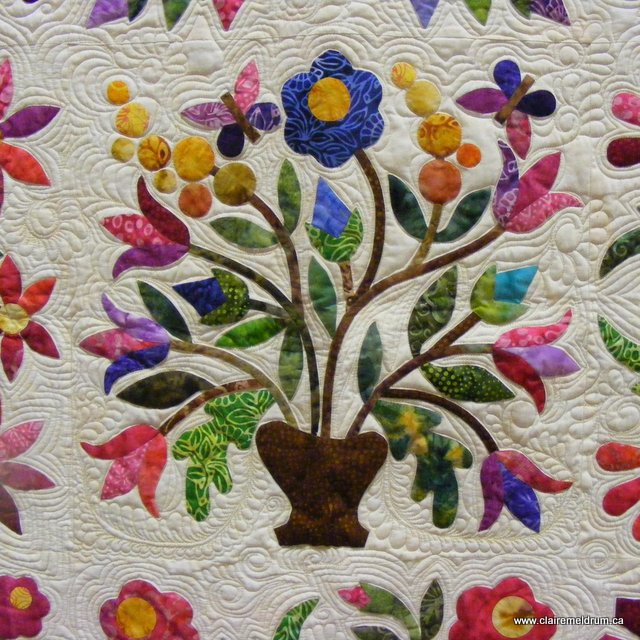
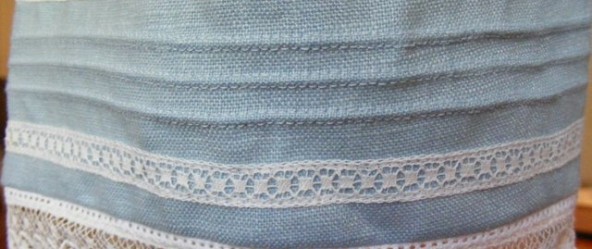
Detail of “Spring Bouquet” Appliqued by Claire Meldrum, Quilted by Alison MacDonald
But it wasn’t all about me! Here are a few of the more than 200 quilts that caught my eye:
This quilt was really two quilts in one. The label says that the quilter helped make the original Grandmother’s Flower Garden quilt when she was 11. After many years, and many owners, it was very worn. But by mounting it on a new, larger background and including a beautiful embroidered history around the perimeter, it helps to preserve the quilt for many more years of enjoyment, while ensuring that its history isn’t forgotten. So clever!

“This Old Quilt” Pieced, Quilted and Embroidered by Catherine Schuler

Detail of “This Old Quilt” Pieced, Quilted and Embroidered by Catherine Schuler
This was a striking modern quilt that really caught my eye because of the vibrant purple and fuschia background. I liked the enormous scale of the blossoms. Simple but striking.

“Gloria” Pieced by Robin Lane, Quilted by Red Red Bobbin Quilt Shop
This was a beautiful sampler style quilt done in lovely tones of red, cream, tan and black. Each block was meticulously pieced and the harmonious colours tied all of the disparate blocks together. These are colours that always attract my eye.

“Celebration Sampler” Pieced by Jill Walton, Quilted by Lucy Rowntree

Detail of “Celebration Sampler” Pieced by Jill Walton, Quilted by Lucy Rowntree
This quilt combined the colouring book craze with quilting with really tremendous results. The quilter first doodled the wild floral design on a plain white expanse of fabric before colouring it all in with fabric markers. I think it would be a great way to introduce kids to quilting and there are so many ways you could personalize it.

“Electric Doodle” Quilted and Coloured by Debbie Winn

Detail of “Electric Doodle” Quilted and Coloured by Debbie Winn
A really effective use of grey as the neutral background. We saw a lot of quilts with black backgrounds and even more with white, but this quilter’s use of grey really struck me. It tied together these really bright, disparate colours and made them soft and inviting.

“Midnight at the Oasis” Pieced and Quilted by Barbara Mahaffy

Detail of “Midnight at the Oasis” Pieced and Quilted by Barbara Mahaffy
And there’s a reason they call them classics. This wall hanging was as simple as they come but the pattern, colour and quilting all appealed to me.

“Cactus Rose” Pieced and Hand Quilted by Denise Neufeld
This was a sculptural quilt. Each of the petals erupts from the quilted background. It definitely took my vote for coolest technique!

“3D Spoon Petal Flower” Pieced and Quilted by Luci Ronald
From the side, you can see just how much depth the quilter was able to create.

“3D Spoon Petal Flower” Pieced and Quilted by Luci Ronald
Finally, this Great Blue Heron was incredibly lifelike. There were layers and layers of fabric to create the wings and all of the bird’s details. It reminded me of a Robert Bateman painting, but in fabric.

“Great Blue Heron” Appliqued and Quilted by Beth Horyn
All in all, a very nice show!