Gathering Threads

Planning my Trip to Baltimore (Quilt Style)

Posted by on May 14 2015

*Waves* I know I’ve been MIA for a while.  I taught a full four courses this term, and started reading for my next round of exams in August.  Sewing time has been limited and blogging even more so.  But now that the winter term has wrapped up, I can focus on the things I’ve let slide.

I haven’t spent a lot of time at my machine recently.  Although I dropped off my Tangled Stars quilt and a cute lap quilt that I made for my sister over Christmas to Alison a few weeks back, made a few quick outfits for my nieces, and even started a quick sundress for myself, I’ve really dialed back on my smocking and sort of cleared the deck.  I’ve still got a few small projects on the go,  but the last little while, I’ve tried to get all my loose ends tied up in preparation for my next big, BIG undertaking…something I’ve been planning for for over a year.

A full size Baltimore Album Quilt.

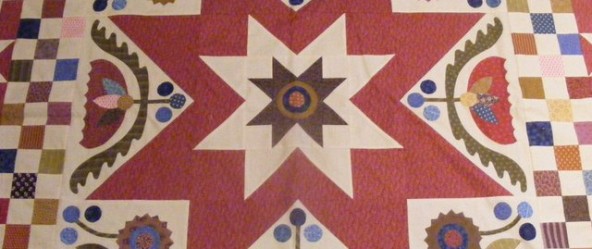
If you’re not a quilter, you might not be familiar with the term.  It’s a type of applique quilt, usually worked on a white background, with really elaborate baskets, flowers, vines and tendrils.  They’re often red and green and gold, but not always.  Here are a couple of period examples.

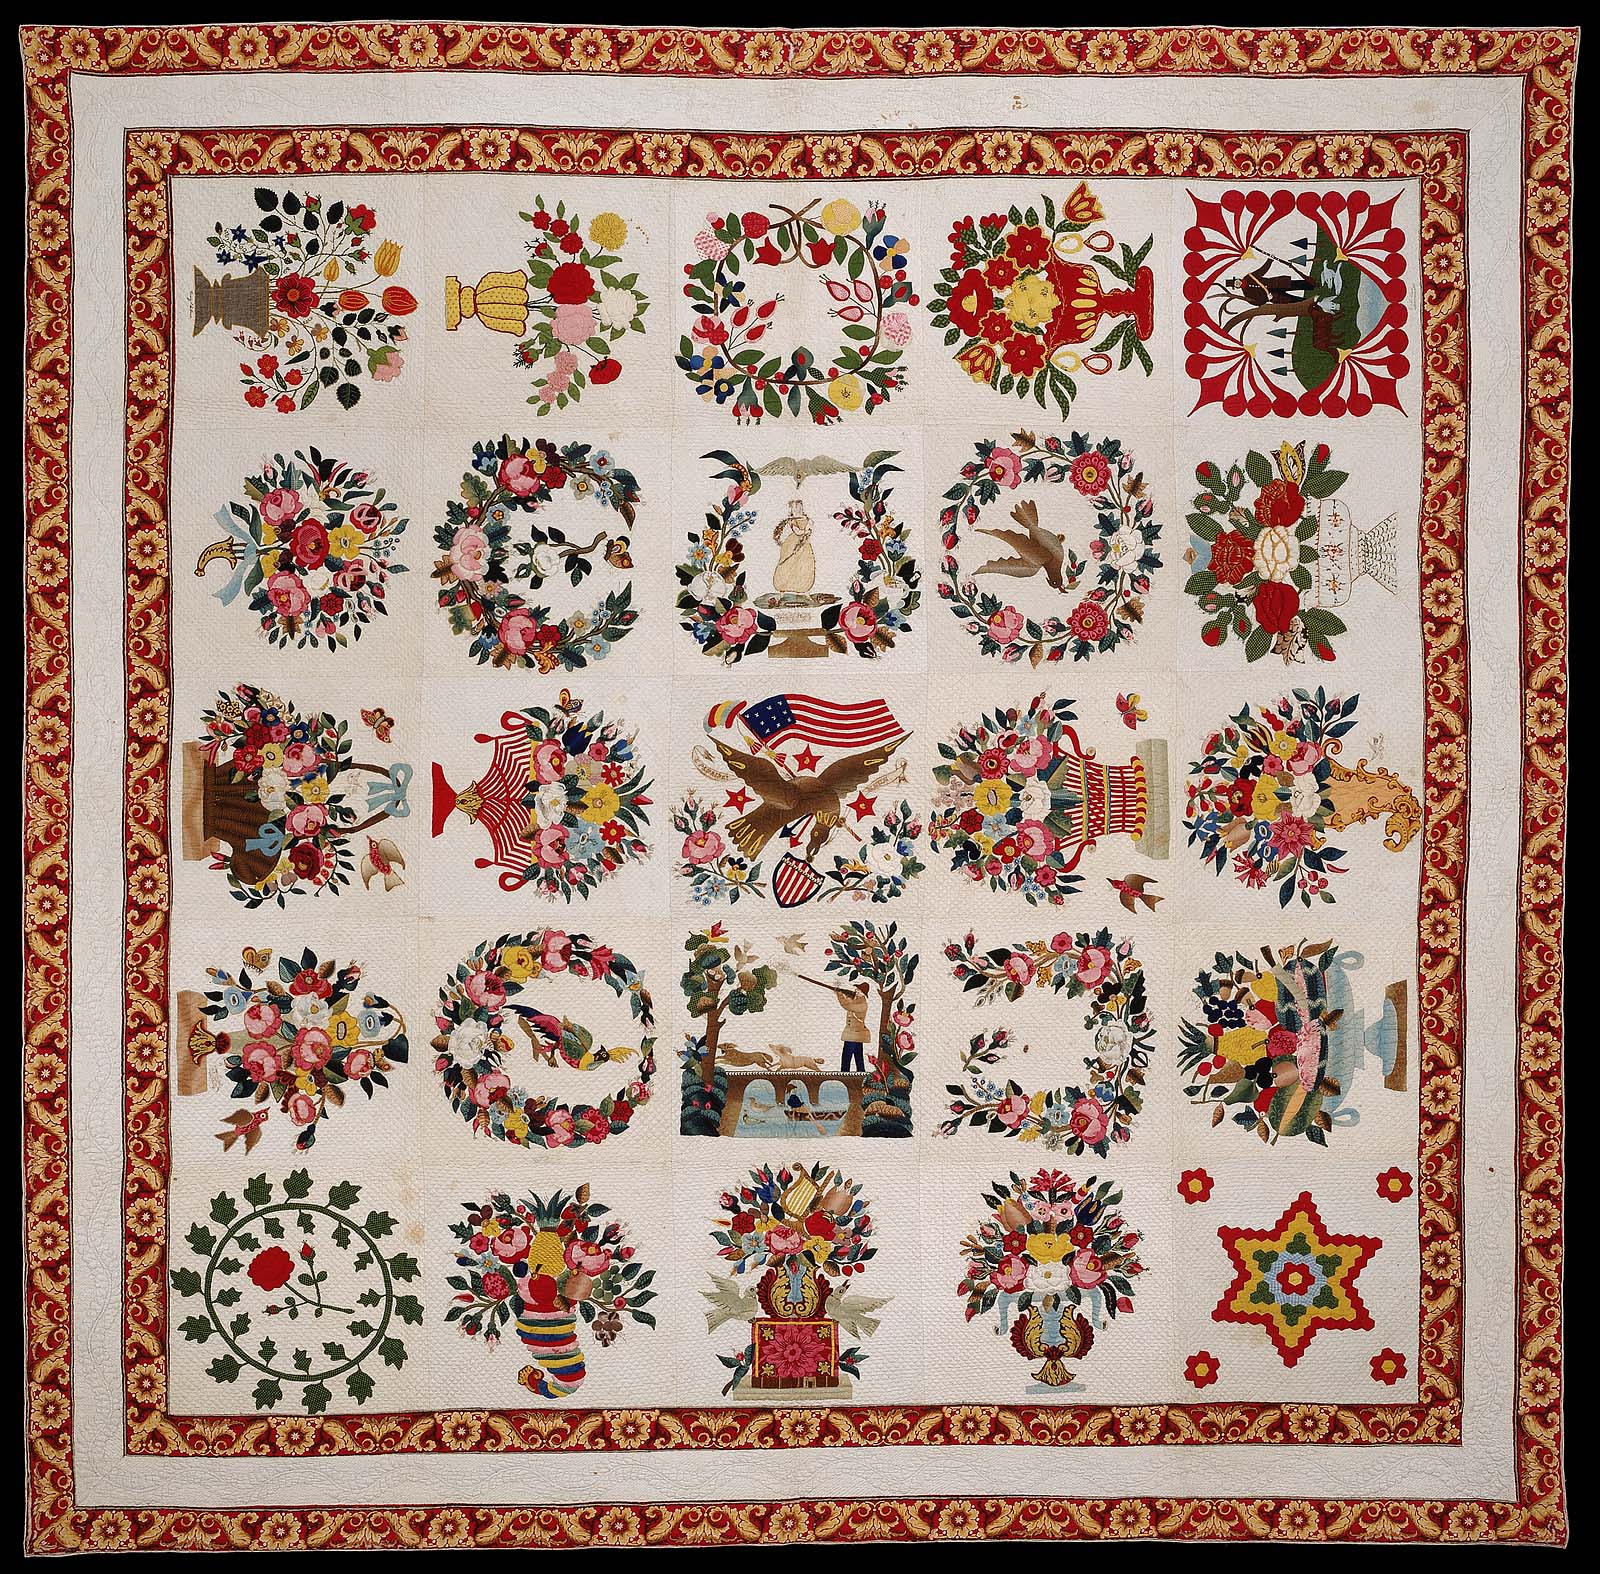
Some are symmetrical or nearly so, some have a different design in every block that showcase things like local buildings or little quilted people. They were a popular quilt style on the East Coast, especially in seaports likes Baltimore in the 1850s and 1860s.  The MFA in Boston and the Baltimore Museum of Art both have sizeable collections online for you to admire.

I’ve wanted to make one for a couple of years now and when I came across this modern recreation by Sue Garman, called “Friends of Baltimore“, I knew I’d be making it.  She’s an extraordinarily talented quilter and many of her quilts are applique.  I am in love with the borders on her design.  Seriously, aren’t they gorgeous?  Well, everything about this quilt is gorgeous but for me, it’s the borders that make it.

friendsofbaltimore (2)

Of course, I will be making a few changes to some of the blocks and swapping out a few more.  For one thing, I don’t want an eagle on my quilt (I’m glad it’s the longest undefended border and all but I don’t really want a big ol’ symbol of America in the middle of my bedding).  And I am eliminating all of the cornucopias.  I hate cornucopias – I think they look like unformed worms.  I don’t know if it’s a childhood trauma from kindergarden or what but they aren’t going to be making an appearance on my quilt.  I’ll use vases instead.

I was determined not to start this quilt til I had caught up on all my unfinished projects.  Of course, that didn’t *entirely* happen but I’m close enough that if I squint everything looks done-ish. 🙂  So as soon as I marked the last assignment, I ordered the pattern from Sue’s website.  You can order the blocks as individual blocks or in one fell swoop.

friendsofbaltimore (3)

I went with ordering the entire quilt pattern.  In a binder, it’s a good 1 1/2 thick!  That’s a lot of instructions and I won’t lie.  It’s a bit daunting.  But the directions are impeccable and I’m confident I’ll be able to handle this quilt.

In addition to clear patterns for each block, Sue includes a plethora of tips and suggestions and breaks down this incredibly labour intensive quilt into very manageable chunks.

friendsofbaltimore (5)

Each block also includes the fabric list so you know how large each piece you need and how many shades of each colour you’ll use.

friendsofbaltimore (4)

The directions are really, really thorough.  I even toyed with the idea of hand applique but after a long hard talk with myself I’ve decided to go with invisible machine applique instead.

I’m going to be using freezer paper for the applique pieces.  I used mylar very successfully with my Spring Bouquet but unlike that pattern, which only had a limited number of standard, reuseable shapes, the pieces of this quilt are entirely irregular.  I found 8 1/2 x 11 sheets of freezer paper at a local quilt shop, and I’ll copy, reverse and print off the freezer paper, which will save me having to trace off every piece.  I got the idea from Simple Bird Applique’s blog.  She’s been working on a gorgeous hand-stitched version of FOB for a couple of years, and I’ve been following her progress avidly.  She’s just embarked on the quilting.  It’s very inspiring.

friendsofbaltimore (6)

So that’s where I stand on this monumental project.  I have most of my fabrics (I just picked up the backing fabric yesterday) and have ordered the last few tools I’ll need before I take the plunge.   So…much…fun!

friendsofbaltimore (1)


Book Review: Art of Crewel Embroidery by Mildred Davis

Posted by on Feb 07 2015

I’m a glutton for punishment.  One of my resolutions for 2015 was to improve my embroidery skills and try more surface embroidery.  With that in mind, I enrolled in the Embroiderers’ Association of Canada’s Basic Crewel correspondence course at the beginning of January.

Thus far, I’m underwhelmed.  I’d been a member of the EAC a number of years ago, and even attended a couple of retreats.  The ladies were lovely, the instruction excellent. Sadly, that experience hasn’t carried over into their distance education.  But I’ve decided to stick it out and if my impressions improve, I’ll let you know.

crewelsample (2)

None the less, I *really* want to take the Intermediate Whitework course, so I’ve decided to stick it out.   I will use this course to earn points for my SAGA Artisan card in Embroidery because that at least is of value to me.

crewelsample (5)

I’ve completed the samples for both of the first lessons and will bang off the research reports this week.  I also started to build up my reference library (another expense!) because I need the books to write the reports.   And this leads me to the book I’m reviewing today:  The Art of Crewel Embroidery by Mildred J. Davis (1962).

DavisArtofCrewelEmbroidery

Because for all my groaning about the EAC’s correspondence course strategy, I am delighted I found this book.  In a nutshell, I think this is perhaps the best embroidery book I’ve ever had the pleasure of coming across.   It is the complete and total package, whether or not you’re interested in crewel work or just surface embroidery generally.  Oh, at it’s available to everyone, for free, through the Internet Archive!  Hooray.

The book opens with a comprehensive history of the technique of crewel.  The bibliography is extensive, with a plethora of primary sources from the Tudor through to the Georgian period. This is no fluffy history, but a substantial and well-researched essay, which includes a good selection of photographs of historical stitching, including a ton of close-up detail shots.  Given the age of the book, many of the photos are black and white but whether they’re grayscale or colour, they’re clear and easy to study, with the museum and collection info easily at hand, should you wish to hunt them down on the internet and see if more recent photos exist.

davisexamplescolour

davisexamples

 Then the book gets into the meat of things.  It includes more than 300 stitches, grouped by type (running stitch, looped stitch, filling stitches etc).  There are black and white photos of each and every stitch, plus clear and easy to follow diagrams for all 300 stitches.   Whether you’re working in wool or doing a crazy quilt for example, there are a plethora of interesting surface stitches to try.

stitches

There’s a  full colour image of traditional colour schemas:colourwool

Then, Davis gives several different projects, designed specifically to allow the new stitcher to try out a range of techniques.  For example, the first project is a little purse.  The stitches and steps to working the project are all spelled out in such meticulous detail that anyone with a modicum of patience could tackle it successfully.

Davisproject1

 Here you can see the design as it would be traced on the fabric.  I love how clear all of the steps are.

Davisproject1a

All of that would be great and more than enough, but Davis still isn’t finished.  There’s still more.   She gives more than 100 sample shapes, with stitch and colour suggestions for how to work them.  This allows the stitcher to design their own, or personalize an existing pattern.  It’s logically organized by type of shape:  small leaves, medium leaves, large leaves, flowers, fauna, stems.  It is absolutely brilliant – I wish every book was as thorough.

Davisdesignunits

davisdesignunitlargeleaf

I can’t recommend this book highly enough.  It really is the complete package and I’m so glad I found it!

Primrose Bishop

Posted by on Feb 02 2015

I’m finally getting a chance to show folks the bishop I finished over the Christmas holidays.  This is Gail Doane’s Primrose, from the Country Bumpkin book Beautiful Bishops.  I’ve made a bunch of bishops from this book, but I’ve  always had my eye on the Primrose.  It’s just so sunshiny and sweet.

Primrose bishop front

I started this dress over the summer, as a swimming lesson project.  The mindless trellis stitch was easy to work away on and didn’t require careful counting or hauling around a lot of materials.  I think it will be perfect for Easter and the spring and summer months.  I’ve been waiting for a nice sunny day to get good photos – winter sewing is always tricky to photograph well.

Primrose bishop back

 The fabric is a lovely striped swiss dot that I picked up on clearance at Fabricland last year, for $4/m.  It’s the real thing and a lovely, soft hand.  I just wish the rest of the dress had been as inexpensive.  The insertions and silk ribbon weren’t cheap and ran me more than $45 bucks once shipping was factored in.

Primrose bishop detail


Primrose bishop shoulder closure (2)

For the floss, I ended up using DMC Satin floss, a 100% rayon thread that’s divisible and that matched the silk ribbon perfectly.   I’m telling you, this stuff is fantastic!  Seriously, stitches like a dream, readily available at Michaels for a good price and comes in a good range of colours that correspond with DMC’s regular cotton skeins, so it’s easy to match and plan.  I’d heard so many horror stories about rayon – shredding, knotting, crazy tangles — that I’d always avoided it and stuck with cotton floss.  No more hesitation.  If you haven’t tried rayon, or had a bad experience with another brand, try this stuff.  It was a joy to stitch with, smooth and easy to handle..  The only thing I had to do was cut slightly longer tails on my knots, because it doesn’t take as tight a knot as cotton but otherwise, I enjoyed every minute I stitched with it.

DMCsatinrayon

It also made great looking violets (or technically, primroses, although I think they look like violets).  The flowers are cast on stitches and french knots, with a lovely sheen.  They’re interspersed between tiny yellow bows decorated with bullion knots.  Aren’t they cute?

Primrose bishop cast-on flowers

 For the hem, I didn’t do the tucks that the book suggested.  It would have been too busy with the vertical stripes in the fabric.  Instead, I just tried to keep the stripes consistent between the dress and the hem band.  A few places are a bit misaligned but on a galloping horse, I think it’ll serve.

primrose smocked bishop  fancy band

 I also changed the closure, from a back button band to a shoulder closure. I put clear snaps along the opening and then buttons with thread loops to finish it.  I’m still on the fence about the buttons – I have searched high and low and simply can’t find small yellow buttons that match as perfectly as I’d like them to.  They’re all lemon yellow, and I need butter yellow. Here’s the difference: without the buttons.

primrose smocked bishop shoulder closure detail

With the buttons:

 Primrose bishop shoulder closure

What’s your verdict?  Can I get away with the variation in colour or should I trade them out for white ones?

The sleeves are finished with the insertion and a small scalloped trim.  I didn’t use the scalloped trim on the neckline as Gail had suggested.  Budgetary concerns 🙂

primrose smocked bishop sleeve detail

I interfaced the pleats with ultra-fine fusible interfacing.  On my first go-round, I tried it without, thinking I could get away without it.  And I could have, if Ellie’s neck was 3″ in diametre.  The fabric just pleated into nothing.  So I mumbled, grumbled and pulled out all the pleating threads and started from scratch.  

primrose bishop pleats with interfacing

Then I interfaced it, the way I should have done in the first place and re-pleated it, having relearned my lesson.  Now the pleats were plump and well supported.  The interfacing extends about .5mm below the last row of smocking but is invisible from the right side.

primrose bishop interior close up

The last part of the outfit was the slip.  The swiss dot fabric is darn near translucent, and so soft that it lacked body without another layer underneath.  You might not recognize the pattern I used for the slip.  It’s Judith Marquis’ Little Snowdrift.

slip front

Normally, it’s a sundress pattern but the round yoke is perfect for underneath a bishop, so I used it instead of drafting my own.  All I did was lower the neckline a couple of centimetres, so that it wouldn’t be visible above the bishop’s neckline.   Judith’s patterns are always really nicely laid out and well drafted, so I knew the fit would be good.

slip back

The hem features five 1/4″ tucks along the bottom, plus some entredeux and baby lace.  I think the tucks are a bit heavy – if I was doing it again, I think I’d go with pintucks instead — but I wasn’t taking them out!

slip hem

And it wouldn’t be a project if there wasn’t at least one snafu.   While I was trimming the seam allowance on the yoke, look what I managed to snip by mistake:

slip yoke

Argh.   But again, it’s a slip.  Fancy underwear.  Nobody’s going to see it!  So I stuck a drop of fraycheck on it, backed it with a tiny square of fusible interfacing and left it alone.  You really have to know where to look and overall, I think Ellie’s going to look adorable in this dress.


Perfect Picture Smocking – A New SAGA Correspondence Course

Posted by on Jan 08 2015

Have you ever wanted to learn to picture smock?  Tried it and been unhappy with your results?  Well, I’m delighted to announce a cure for what ails you:  Perfect Picture Smocking is SAGA’s newest correspondence course, designed to help you master picture smocking, and I am SAGA’s newest teacher.

This is a five-part correspondence course open to all SAGA members, and the cost is $105USD.  Artisans members earn 10 points when they complete the course.  You can enroll any time, from any where, and you work at your own pace, with a full year to complete all the lessons.

In each lesson, you’ll tackle a skill that will help you master picture smocking, discussing everything from what materials and supplies make for good results, to backsmocking, changing colours, working with a variety of shapes, increasing and decreasing and more.  The full-colour lessons include dozens of close-up photos of each skill, with step-by-step directions, and easy to follow, computer generated graphs to ensure your success.  And of course, I’m never further away than an email or phone call, should you run into problems or have questions.

samplepage

And don’t think you have to be an expert smocker to enroll.   If you have basic smocking know-how and can execute a few elementary stitches like cable and trellis, you’ll be amazed at what you can do!   Proficient smockers will benefit, too, as I share a boatload of tips and tricks for making perfect stacked cable designs each and every time!   Registering can be done one of two ways: online by clicking here or you can print off the registration form and mail it in to SAGA.

As many of my regular readers know, I’m a huge fan of SAGA’s Distance Education courses, having taken three with great teachers such as Darcy Fechner and Nancy Malitz over the past several years.  I’ve always learned so much and I’m delighted that now I get to pass on my skills and knowledge, too.  So whether you decide to sign up for my new course or decide on one of the other great courses that SAGA offers, I hope that you’ll make 2015 the year you try a new skill and work on building your smocking and embroidery repertoire.   Check out the entire list of SAGA correspondence courses available here.

I look forward to this new teaching adventure with you all!


Farm Girl Finery Quilt Top Done

Posted by on Dec 08 2014

Another quilt top complete!  I can put a check mark beside Farm Girl Finery and call it a day.

farm girl finery quilt top (2)

But please, don’t go thinking I’ve been sewing up a storm.  I have barely touched my machine since Hallowe’en.  I’ve just been too busy between teaching, prepping for my comprehensive exams, getting ready for the holidays and family time to sew so much as a seam.  The truth is, I completed this quilt top before Hallowe’en.  I just haven’t had a chance to get decent pictures and post them here to my blog before now.  It’s sort of like time-lapse photography – emphasis on the time-lapse!

farm girl finery quilt top (6)

None the less, I’m really happy that this is done.  It went together very smoothly (you can see my earlier review of Kim Diehl’s book, “Simple Appeal” here).  I found the instructions for constructing the quilt top good, once I made the alterations to the cutting instructions to reduce excess fabric requirements.

All of the applique is by machine.  I didn’t use wool, which is what the sample quilt featured.  I used cotton prints from my stash instead. I used the same invisible machine applique technique that I did for Spring Bouquet, which I learned from Erin Russek’s wonderful series of tutorials.

farm girl finery quilt top (3)

I’ve been playing with quilting motifs and ideas for how I want Alison to quilt this although   I won’t have time to get this to her until January.   I’m definitely going to go with wool batting – I love the loft and the weight (it’s incredibly light).  I found an 6″ oak leaf wreath stencil that I think will be perfect for the outer stars.  Then a feather motif for the large central star and some kind of stippling around the main floral applique in the centre block.

farm girl finery quilt top (4)
You won’t see much of me for the next couple of weeks.  I’ll be writing my comprehensive exams beginning this Thursday and then the boys will be finished school and beginning their holiday break the day after I finish writing it.  But I will get a year in review post up at some point this month because I always like to go back and see what I’ve made over the course of a year.   So cross your fingers for me – I’ve been studying for this exam for eight months – and I’ll see you all on the other side!